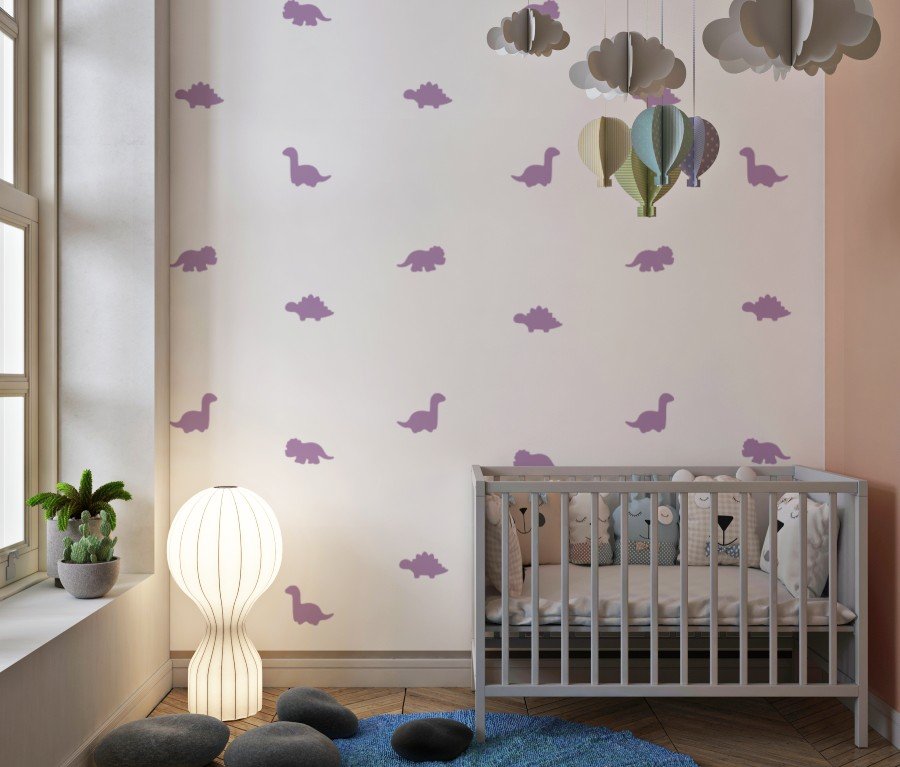


Turn your walls into a prehistoric playground with our Dino Wall Decals! Featuring three adorable dinosaur designs – a triceratops, a stegosaurus, and a brachiosaurus (long neck). Designed and made locally in New Zealand – these decals are perfect for creating a fun and imaginative space for your little dino lover. Whether it’s for a nursery, bedroom, or lounge, these premium-quality decals make decorating easy and damage-free.
Key Features:
- Locally Designed and Made: Proudly crafted in New Zealand with high-quality materials.
- Premium Quality Vinyl: Made from high-grade removable vinyl that’s designed to last years and won’t damage walls or leave sticky residue.
- Safe for Walls: Can be applied to most wall surfaces, including wallpaper, without causing damage or leaving residue.
- Made to Order: Each pack is carefully made to order and shipped within 1–3 business days.
Why Choose Whimsy Lane Decals?
- Quick & Easy Decoration: No need for nails, paint, or mess – simply peel and stick!
- Wall-Friendly: Removable vinyl means no damage to your walls, making it perfect for rentals.
- Quick Turnaround: Our decals are made to order and ship within 1–3 business days.
- Locally Made: When you buy from us, you're supporting New Zealand design and local business.
- Generous Pack Sizes: Includes more decals than most other packs for a complete and beautiful look.
Bring Your Walls to Life!
Refresh your space with our stunning Dino Wall Decals, proudly designed and made in New Zealand. Whether you want to create a serene nursery or a stylish feature wall, these decals are the perfect choice. Order yours today and enjoy a simple, elegant way to decorate!
Additional information
| Pack Size | Small (21 pieces, covers 1.6m wall), Large (42 pieces, covers 3.2m wall) |
|---|---|
| Theme | Dino |
| Collection | Decals |
What's Included
Our dinos come facing in mixed directions.
Large Pack
42 pieces, covering approximately 3.2m (based on a standard wall height of 2.4m).
- 14x Triceratops 15 x 8cm each
- 14x Stegosaurus 15 x 8cm each
- 14x Brachiosaurus (long neck) 15x 12.2cm each
Small Pack
21 pieces, covering approximately 1.6m.
- 7x Triceratops 15 x 8cm each
- 7x Stegosaurus 15 x 8cm each
- 7x Brachiosaurus (long neck) 15x 12.2cm each
Recommended spacing is around 30-35cm between decals. You can extend the coverage by spacing them further apart – they’ll look amazing either way!
🌟 Please Note!
Our Dino Decals come in a mix of directions rather than all facing the same way. We’ve carefully designed them this way because it creates a more dynamic and visually appealing look—perfect for bringing your space to life! 🦖✨
Tips
1. Prepare the Surface: Ensure the wall is clean, smooth, and completely dry before starting.
2. Position and Apply:
- Slightly peel the backing from the decal.
- Place part of the decal on the wall in the desired position.
- Slowly peel back the rest of the backing while using a credit card to smooth out any air bubbles as you go.
3. Finishing Touch: Once fully applied, gently go over the decal with the card to ensure it adheres smoothly and firmly.
Name Decals:
Some of our name decals feature intricate designs, so we include a transparent transfer tape to ensure easy application and perfect alignment. Follow these steps for a smooth and professional finish:
1. Prepare the Surface: Ensure the wall or surface is clean, smooth, and dry.
2. Peel a Corner: Gently peel back a small corner of the white backing from the decal. The decal should remain attached to the transparent transfer tape.
3. Position the Decal: Place the exposed corner of the decal in your desired location, ensuring it’s properly aligned.
4. Apply Gradually: Slowly peel away the white backing while smoothing the decal onto the surface. Use a credit card or similar tool to press the decal down and remove any air bubbles as you go.
5. Secure the Design: Once the backing is completely removed, go over the entire decal with the card to ensure it’s fully adhered and bubble-free.
6. Remove the Transfer Tape:
- Carefully peel away the transparent transfer tape, leaving the decal adhered to your surface.
- Do this slowly and ensure the decal does not lift.
- If any part of the decal begins to lift, use a card to smooth it out and press it firmly back onto the surface. Then, continue peeling the transfer tape away.
These steps will ensure a flawless, professional finish for your wall decals! 🌸
FAQs
Can I request a custom colour?
While we stock a selection of colours, we can often source other colours upon request. Reach out to us at hello@littlewhimsy.co.nz, and we’ll do our best to help!
Can you create a custom design for me?
If you’re looking for something different, we’d love to hear your ideas! We’re always working on new designs and may be able to create something special just for you.
How long do the decals last?
We only use high-quality vinyl designed to last for years, so your decals will look fantastic for a long time.
Are the decals reusable?
Our decals are designed to be removable but not necessarily reusable. Removing them may cause damage or reduce their adhesive properties, so they are best for one-time application.
Where are the decals made and shipped from?
All our products are proudly designed and made in New Zealand, shipped directly from Tauranga, Bay of Plenty.
How long does it take to ship my order?
Since all our decals are made to order to ensure top quality and variety, we aim to ship orders within 1–3 business days.
What surfaces can the decals stick to?
Our decals work best on smooth, clean, and dry surfaces, including most painted walls and wallpaper. Lightly textured walls may work, but we recommend testing a small area first.
Will the decals damage my walls?
No! Our removable vinyl is wall-safe and won’t damage surfaces or leave sticky residue when removed.
How far do decal packs go?
-
- Large Pack: Covers approximately 3.2m at a standard wall height of 2.4m.
- Small Pack: Covers approximately 1.6m.
Spacing recommendations can be found under the 'What's included' tab, you can space decals further for extended coverage.
How big are name decals?
Our name decals are roughly 25x25cm depending on the design.
Do you accept returns or exchanges?
As each decal pack is made to order, we cannot offer returns or exchanges unless the product is faulty. If you have any issues, please contact us at hello@littlewhimsy.co.nz, and we’ll be happy to assist.
What is the easiest way to apply the decals?
- Prepare the Surface: Ensure the wall is clean, smooth, and completely dry before starting.
- Position and Apply:
- Slightly peel the backing from the decal.
- Place part of the decal on the wall in the desired position.
- Slowly peel back the rest of the backing while using a credit card to smooth out any air bubbles as you go.
- Finishing Touch: Once fully applied, gently go over the decal with the card to ensure it adheres smoothly and firmly.
For name decals:
Some of our name decals feature intricate designs, so we include a transparent transfer tape to ensure easy application and perfect alignment. Follow these steps for a smooth and professional finish:
- Prepare the Surface: Ensure the wall or surface is clean, smooth, and dry.
- Peel a Corner: Gently peel back a small corner of the white backing from the decal. The decal should remain attached to the transparent transfer tape.
- Position the Decal: Place the exposed corner of the decal in your desired location, ensuring it’s properly aligned.
- Apply Gradually: Slowly peel away the white backing while smoothing the decal onto the surface. Use a credit card or similar tool to press the decal down and remove any air bubbles as you go.
- Secure the Design: Once the backing is completely removed, go over the entire decal with the card to ensure it’s fully adhered and bubble-free.
- Remove the Transfer Tape:
- Carefully peel away the transparent transfer tape, leaving the decal adhered to your surface.
- Do this slowly and ensure the decal does not lift.
- If any part of the decal begins to lift, use a card to smooth it out and press it firmly back onto the surface. Then, continue peeling the transfer tape away.
These steps will ensure a flawless, professional finish for your wall decals! 🌸
If you have more questions, don’t hesitate to get in touch – we’re here to help! 😊
Dino Wall Decals
Generous Pack Sizes – More Decals for Less!
$35.99 – $59.99
Turn your walls into a prehistoric playground with our Dino Wall Decals! Featuring three adorable dinosaur designs – a triceratops, a stegosaurus, and a brachiosaurus (long neck). Designed and made locally in New Zealand – these decals are perfect for creating a fun and imaginative space for your little dino lover. Whether it’s for a nursery, bedroom, or lounge, these premium-quality decals make decorating easy and damage-free.
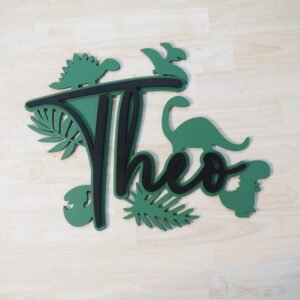
Pair it with our Custom Name Decal—perfect for bedroom doors or as a stunning centerpiece on your walls! Dino Name Decal
Our generous decal packs cover more space than competitors, giving you more value for your money!
You may also like…


Customers also purchased
-

Dino Layered Monogram
$19.99 – $39.99 -
Dino Letters – Layered
$14.99 – $29.99 -
Dino Letters – Single Layer
$9.99 – $19.99 -
Dino Name Board
$24.99 – $39.99 -
Dino Personalised Name Wall Decor
$46.99 -
Personalised Layered Dino – Dino Pattern
$32.99 – $42.99 -
Layered Dino – Dino Pattern
$32.99 – $42.99 -
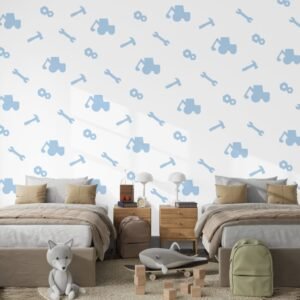
Construction Wall Decals
$35.99 – $59.99 -
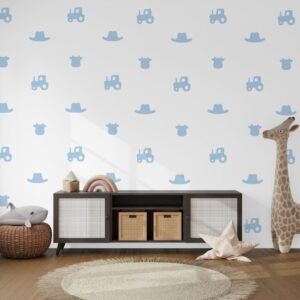
Farm Wall Decals
$35.99 – $59.99 -
Heart Wall Decals
$35.99 – $59.99 -
Surf Wall Decals
$35.99 – $59.99 -
Mixed Wall Decal Pack – A Fun Collection of All Your Favourites!
$35.99 – $59.99